How to Build a Circle in Minecraft (Any Size)
By Sealmount · Updated
Minecraft has no round blocks, so every circle in the game is a staircase of squares that reads as round from a few steps back. Getting one right is mostly bookkeeping: pick a size that suits the build, put the footprint in the right place, and lay each row without losing count. This guide covers all three, using the same rules the Sealmount circle generator uses to draw its charts.
The short version
- Choose a diameter, the full width in blocks. An odd number gives you a single center block.
- Set up the plan: Hollow ring for a wall or Filled disc for a floor, then thickness and wall height. Note the block count.
- Mark the north-west corner of the square the circle fits in, not the center.
- Lay row 1 along the north edge: count the skip from the west edge, then place the run going east.
- Step one block south for each new row, counting every skip from that same west edge.
- Check the symmetry before you build up, then repeat the layer for a wall.
Open an 11-block circle in the generator
How a block circle is decided
Picture a true circle drawn over the block grid, as wide as your diameter. A square gets a block when its center lies inside the circle. That is the whole rule for a filled disc.
Take an 11-block circle, radius 5.5. Row 1, the northmost row, lies 5 blocks north of the center, where the circle is narrow. There, the square two steps east of the middle column is 5.39 blocks from the center, so it is in; the next one out, at 5.83, is not. Row 1 gets 5 blocks, which is why the chart tells you to skip 3 squares and place 5.
A hollow ring keeps the blocks of that disc that have at least one side (north, east, south or west) facing empty space. Thickness 2 keeps every block within two side-steps of the outside, and so on. Distance is counted through block faces, never diagonally, and two things follow:
- The outside edge is the same at every thickness. Extra thickness is added inward, so you can lay the outer ring first and decide on thickness later.
- On the diagonals, a 1-thick ring touches only at corners. It is still closed: nothing can walk through the seam where two full blocks meet at a corner, and water doesn’t flow diagonally.
The game has no circle rule, so this is one sensible choice among several: keeping only squares wholly inside the line gives a thinner circle, and keeping every square the line touches gives a fatter one. That is why two generators can disagree by a block at the edges. Take the chart and the block count from the same tool.
Odd or even diameter?
Whether the diameter is odd or even decides what sits in the middle, and that matters more than the one block of size.
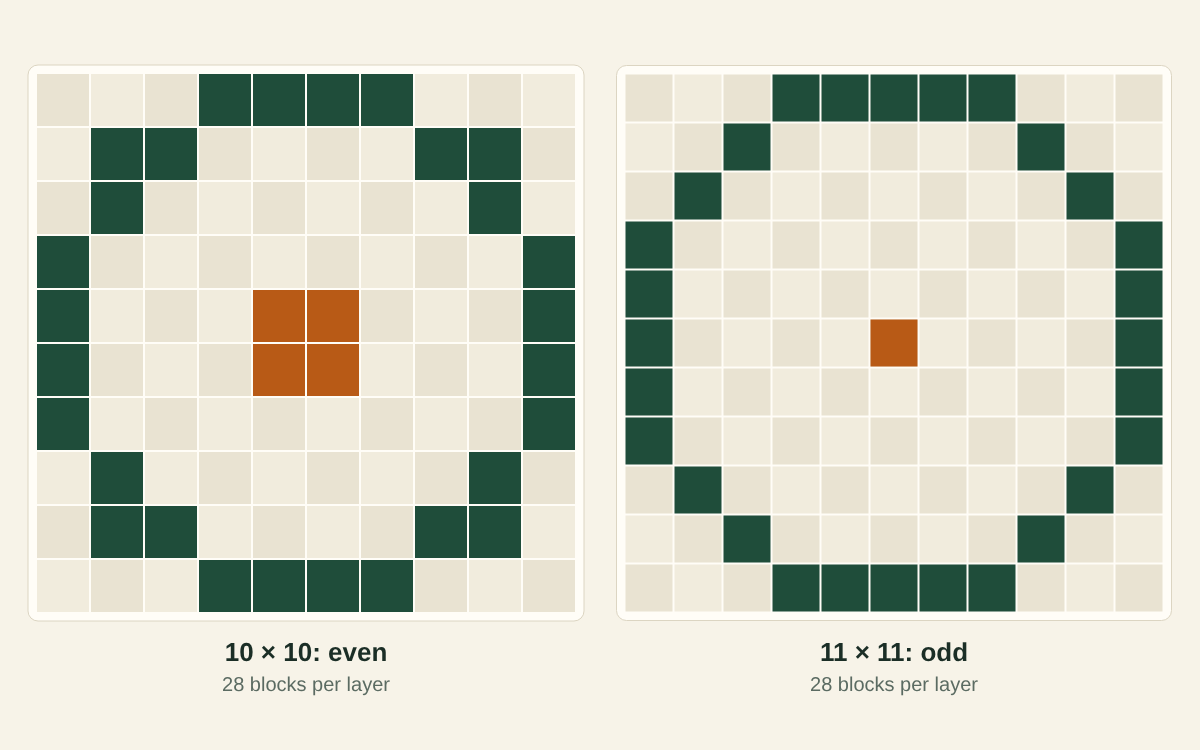
- Odd (7, 11, 21…): the center is one block. Every flat side has an odd length, so a one-wide door or a three-wide gate sits exactly in the middle of it, and a central pillar, beacon or ladder shaft has an obvious spot. An 11 has flat sides of 5.
- Even (10, 12, 20…): the center is the point where four blocks meet. The flat sides are even, which suits a double door or a 2 × 2 column in the middle. A 10 has flat sides of 4.
Unless you have a reason to go even, go odd: a single center block is much easier to find in the world. The step from 10 to 11 costs nothing here: both rings take 28 blocks a layer. On the chart, Show guides marks the center and both midlines without adding any blocks.
Choosing a size
The diameter is the outside width, so the room inside is smaller than the number suggests. With a 1-thick wall, the floor across the middle is the diameter minus 2, so 9 blocks inside an 11; each extra block of thickness takes another 2 off. Small circles also look blocky: a 7 is close to an octagon, with 3-block sides joined by single diagonal steps. Each diameter below links to its full chart.
| Diameter | Good for | Ring, 1 thick | Filled disc |
|---|---|---|---|
| 7 | Well, fountain, planter | 16 | 37 |
| 11 | Small tower, silo | 28 | 97 |
| 15 | Tower with stairs inside | 40 | 177 |
| 21 | Castle keep, domed hall | 56 | 349 |
| 25 | Courtyard, small arena | 68 | 489 |
| 31 | Arena, plaza, pond | 84 | 749 |
| 51 | Village wall | 144 | 2,053 |
| 101 | Town wall, moat | 284 | 8,021 |
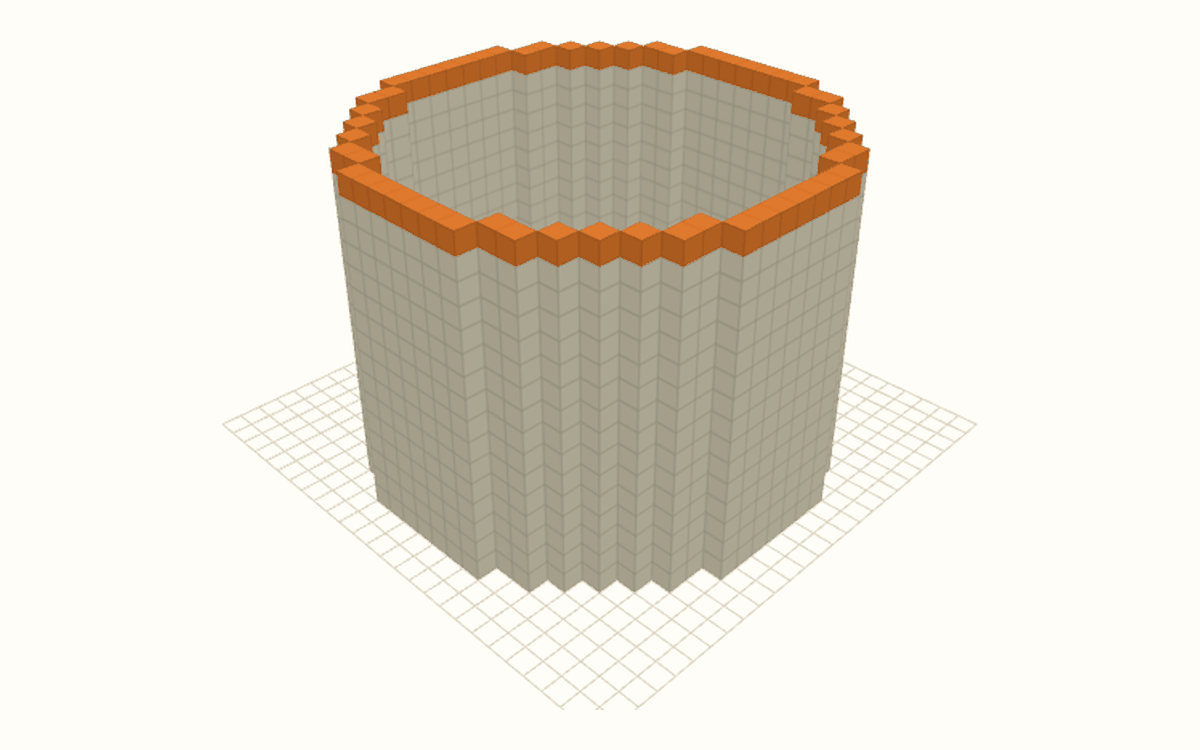
For a wall, multiply by the height: an 11-block ring 8 layers high is 28 × 8 = 224 blocks, or 3 stacks and 32. The generator does the sum and shows it in stacks of 64. For big walls, think in shulker boxes: one holds 27 stacks, 1,728 blocks. Floors, roof and decoration are not included.
Mark the footprint in your world
The chart sits in a square, the footprint, as wide and deep as the circle. Its top edge is north, its left edge is west, and everything is counted from the north-west corner: row 1, column 1. That square is often empty in the plan (an 11’s first block is in column 4), but it is still the one to mark. The plan is the same in Java and Bedrock; only reading your position differs.
Find north
On Java, press F3: facing north, the Facing line says north, towards negative Z. On Bedrock, walk a few blocks and watch your coordinates: Z gets smaller as you walk north, and X gets bigger as you walk east. In both editions the sun rises in the east. Don’t use a compass; it points to the world spawn, not north.
Read block coordinates
On Java, use the F3 Block line (the block your feet are in) or Targeted Block (the block under your crosshair), not the decimal XYZ line. Decimals trip people up at negative coordinates: at X −0.4 you are standing in block −1, not block 0. (From Java 1.21.9, F3 + F6 lets you pin chosen lines on screen.) On Bedrock, turn on Show Coordinates in the game settings, or run /gamerule showcoordinates true in a world with cheats on; your position appears at the top left. Only X and Z matter here. You choose the height of each layer yourself.
From the center to the corner
You usually know where the middle of the tower should go, not its corner. For an odd diameter, subtract (diameter − 1) ÷ 2 from the center’s X and Z. For an 11 that is 5, so a center at X 105, Z −45 puts the north-west corner at X 100, Z −50. For an even diameter, take the north-west block of the middle four and subtract (diameter ÷ 2) − 1: 4 for a 10.
Mark the corner and the center with a block you will break later. Then, in the generator, open Building at exact game coordinates?, turn on Use world coordinates and enter the corner as NW block X and NW block Z. Each row now shows its world Z and the X range of every run: row 1 of that 11 reads X 103 to 107 at Z −50.
Build it row by row
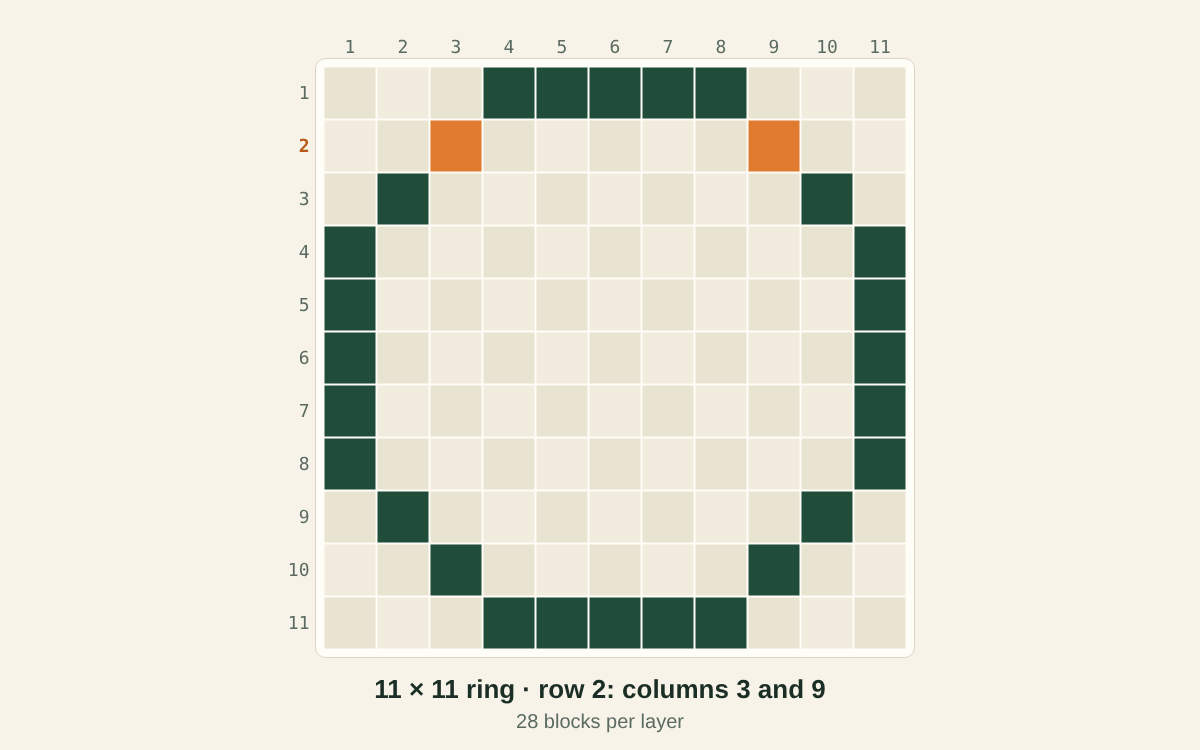
Row 1 is the north edge, rows run south, and columns count from the west edge, starting at 1. The current-row card shows each run as a column range (Columns 4–8); the row list and the TXT download put it as a skip: “skip 3 from west, place 5”. When a row has two runs, the second skip also counts from the west edge, not from your last block. A whole 11-block ring:
| Row | Columns | Instruction |
|---|---|---|
| 1 | 4–8 | skip 3 from west, place 5 |
| 2 | 3 and 9 | skip 2 from west, place 1; then skip 8 from west, place 1 |
| 3 | 2 and 10 | skip 1 from west, place 1; then skip 9 from west, place 1 |
| 4–8 | 1 and 11 | place 1 on the west edge; then skip 10 from west, place 1 |
| 9–11 | rows 3, 2 and 1 again | |
- Stand on the corner marker and face east. You are on row 1, column 1.
- Count east with the corner as column 1, and place the run.
- Press Mark row done, walk back to column 1 and step one block south: that is row 2.
- Repeat to the last row. Checks are saved in this browser, so you can stop and come back.
Check it with symmetry
A circle on this grid mirrors itself, which lets you catch a miscount before the next layer buries it.
- East matches west. The empty squares after a row’s last block equal the skip before its first. Row 1 of an 11: 3 empty, 5 blocks, 3 empty.
- South matches north. The last row repeats the first, the second-to-last the second, and so on.
- A circle matches itself turned a quarter. Column 1 of an 11 has blocks in rows 4–8, just as row 1 has them in columns 4–8. Walk around the layer: all four quarters should show the same steps.
- The count matches. Carry exactly one layer’s worth, 28 for the 11. Blocks left over, or running out early, means a mistake in that layer.
Walls, floors and thicker rings
For a wall, set Wall height under Building it more than one block high?. Every layer of a circle wall is identical, so once layer 1 is right and checked, the next layer is one block on top of each block below.
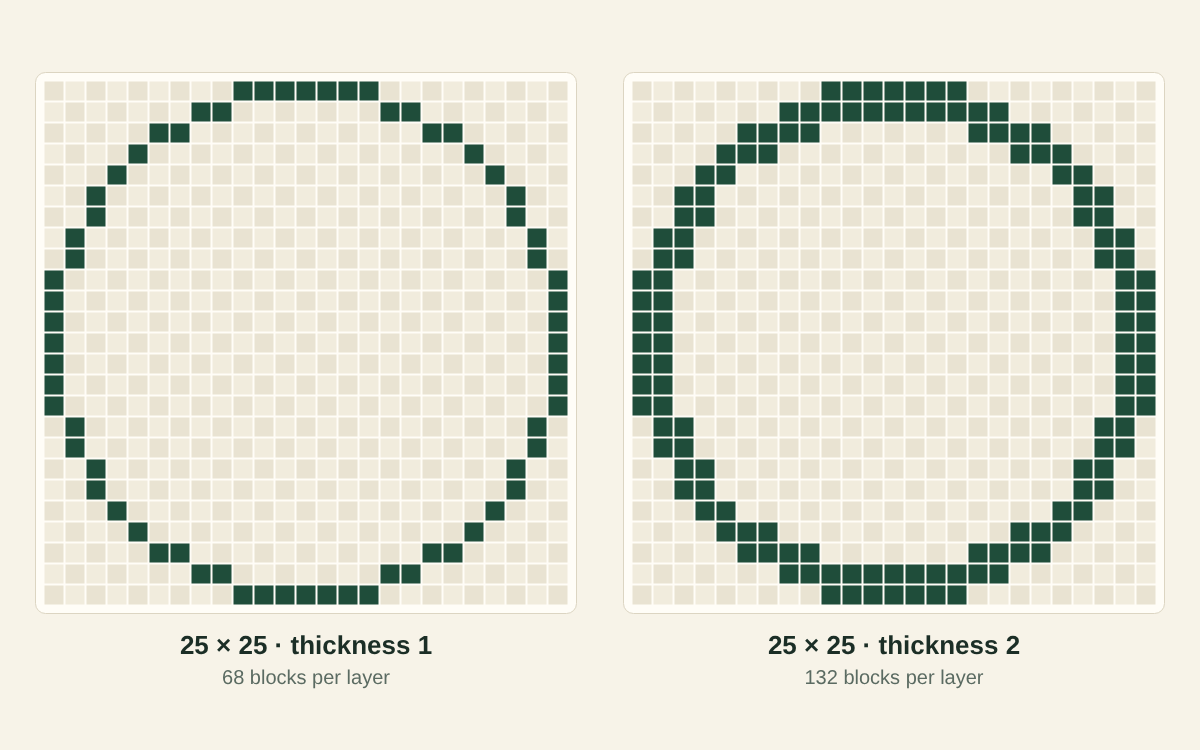
Thickness adds rings inward. A 25-block ring takes 68 blocks a layer at thickness 1 and 132 at thickness 2, and from outside they look the same. A thicker wall gives you deep window openings and a walkway along the top; a walkway needs thickness 2 or more, because a 1-thick ring only meets at corners on its diagonals. The maximum, (diameter − 1) ÷ 2 rounded down, leaves just the center hollow: 5 for an 11, which is 96 blocks. A 25-block tower, 2 thick and 8 high, is 132 × 8 = 1,056 blocks: 16 stacks and 32.
Open a 25-block tower, 2 thick and 8 high
For a floor, a platform or a flat roof, choose Filled disc; thickness doesn’t apply. A filled 11-block disc is 97 blocks. To floor the inside of a ring you have already built, you need the disc minus the ring: 97 − 28 = 69 blocks for an 11.
Ovals
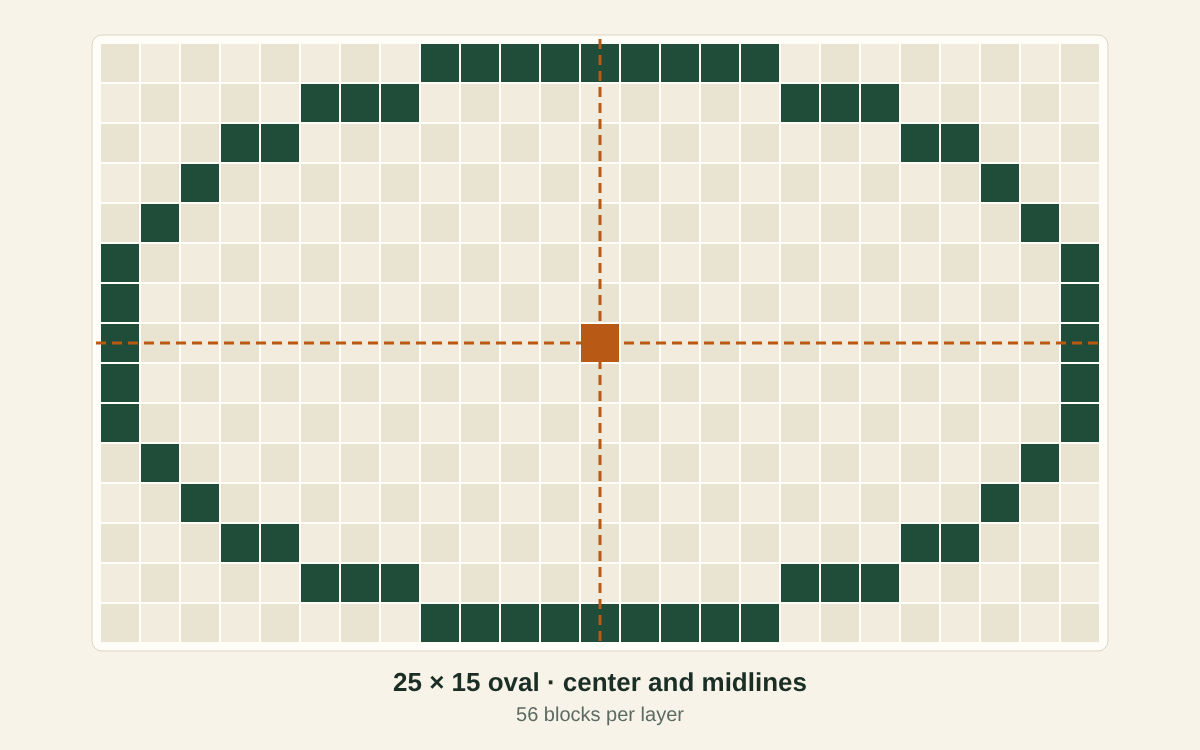
Open Not a perfect circle? and turn on Use an oval footprint. Width runs east–west and depth north–south, and the rule is unchanged: a square gets a block when its center lies inside the oval. To run the long side north–south, swap the two numbers; the top of the chart is always north.
An oval still mirrors east to west and north to south, so the first two symmetry checks work, but the quarter-turn check doesn’t. With both sides odd it has one center block; with one odd and one even side, the center falls on the edge between two blocks. A 15 × 11 oval ring takes 36 blocks a layer, a 25 × 15 takes 56.
Big circles: 31 blocks and up
Counting 40 squares along a row is where big circles go wrong. Let coordinates do the counting:
- Turn on world coordinates with your north-west corner. Each run in the current row then reads like “X 103 to 107 · Z −50”.
- Mark the four flat sides first in a cheap block: the runs of the first and last rows, and the west and east blocks of the middle row. If they don’t sit evenly around your center marker, the corner is wrong, and now is the cheap time to fix it.
- Fill in one quarter at a time, walking each row until your position reads the start of a run, then placing until it reads the end.
- Check the layer, then build up in your real material.
Keep each layer at one Y level, even on a slope: dig into the high side or fill under the low side, or the top of the wall will follow the ground.
More formats has a PNG or SVG chart with every fifth grid line darker for counting, a TXT of every row (with world coordinates when they are on), and structure files if you would rather not place by hand: .litematic for the Litematica mod on Java, .mcstructure for a Bedrock structure block, which loads at most 64 × 64 blocks across.
Common mistakes
- Counting the second skip from the last block instead of from the west edge.
- Entering the center as the coordinates instead of the north-west corner of the square.
- Swapping rows and columns. A circle forgives it, because it is the same either way; an oval comes out turned a quarter and no longer matches its world coordinates.
- Mixing generators, or entering a radius. If another tool’s “radius 10” is 21 blocks wide, enter 21 here.
- Expecting slabs and stairs in the count. The plan uses full blocks only; smoothing the steps with them is your own finish and changes the count.
From a circle to a round tower with a dome
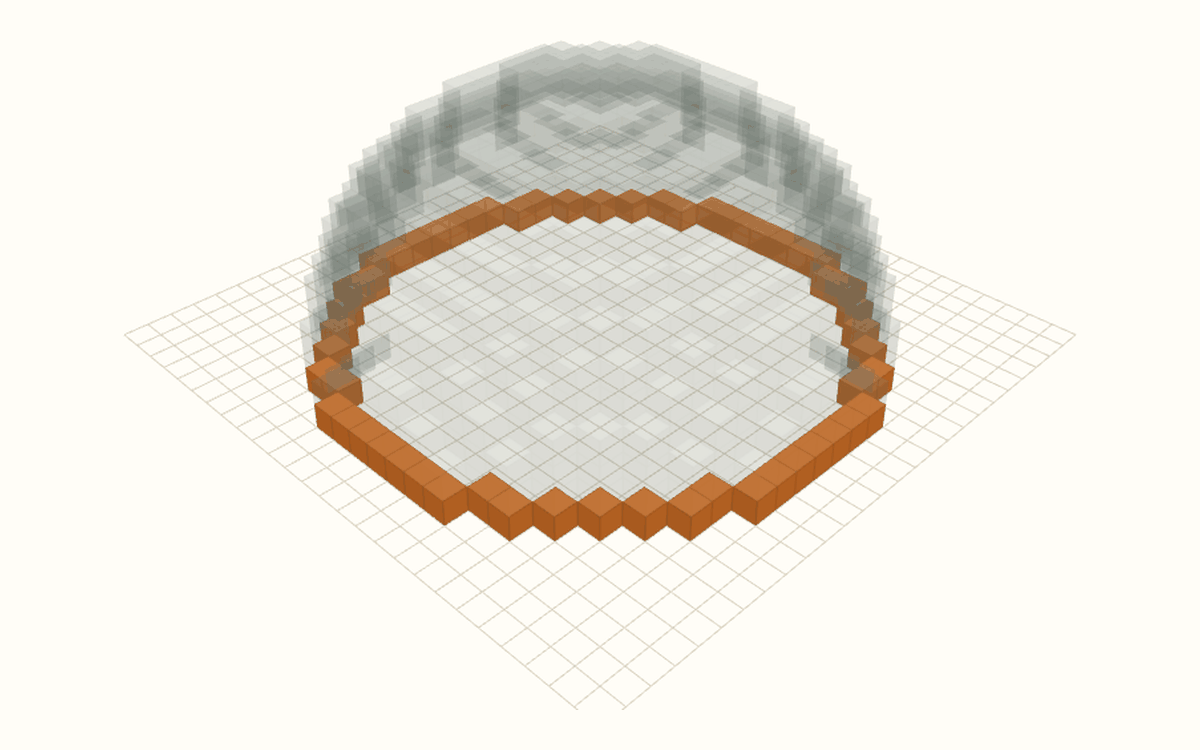
A dome is the natural roof for a round tower. Its bottom layer has exactly the same outer edge as the circle with the same diameter, so it sits flush on the wall.
- Plan the wall in the circle generator, say a 21-block ring 16 layers high.
- Open a dome with the same width. At 21 across it is 11 layers high, half the diameter rounded up, which is what makes it round.
- Build dome layer 1 directly on the last wall layer, from the same north-west corner, then work up one layer at a time.
Near the top, the dome’s layers come out as wide rings and the very top as a solid cap; that keeps the shell closed where the surface is nearly flat. For a flatter roof, lower the dome’s height. The sphere page’s worked example, a 15 × 11 oval tower with a dome, totals 36 × 8 tower blocks plus 197 for the dome: 485 blocks over 14 layers.